Create Clean Subtitles from Zoom Recordings

Zoom’s automatic captions are convenient but often messy. To create professional subtitles, you’ll need to tidy up the transcript and export it in a standard format like SRT. Doing so improves readability and ensures compatibility with video editing software.
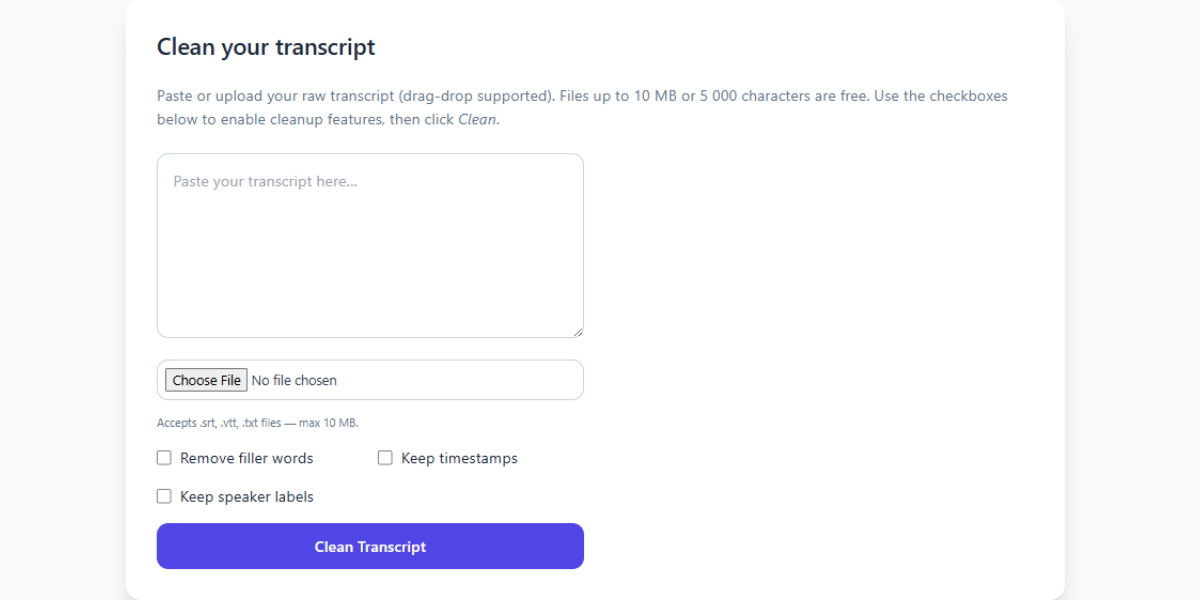
First, download the VTT file from your Zoom account. Upload it to the Zoom Transcript Cleaner. The tool removes timestamps and filler words while fixing capitalization. You can preview the changes before downloading the cleaned text.
Next, choose the SRT export option. This converts the transcript to a widely supported subtitle format. Import the file into your editing software—Adobe Premiere, Final Cut, or any other program that accepts SRT. If needed, adjust timing slightly to match the video perfectly.
For longer recordings, break the transcript into chapters or segments. Add headings so viewers can jump to the relevant section. The walkthrough guide includes screenshots on segmenting transcripts efficiently.
Remember to double-check proper nouns, technical terms, and industry jargon. Zoom’s AI can misinterpret unusual words, so keep a glossary handy. Our AI cleaning guide explains how to train the tool with your custom vocabulary.
Once the subtitles look good, upload them to your video hosting platform. Well-formatted captions not only aid accessibility but also boost SEO. Check out our SEO tips for more ways to leverage transcripts.
By following this workflow, you’ll produce clean subtitles quickly and keep your audience engaged.
If you plan to share clips on social media, consider burning the captions into the video so they appear even without a separate subtitle file. Most editing programs let you style the text with your brand colors.
You can also repurpose the transcript into a blog post. Add a short introduction and conclusion, then embed the cleaned text. This approach gives you an extra piece of content with minimal effort while boosting SEO.
As you repeat the process for each recording, keep a template of your preferred settings. Consistency saves time and ensures viewers know what to expect when they see your subtitles.
Related Articles
For multilingual audiences, consider creating subtitle files in additional languages. Services like automatic translation can speed up the process, but a native speaker should review the final text for accuracy. Offering multiple subtitle options widens your reach and makes the recording useful to a global audience.
You may also want to keep a version of the transcript with timestamps intact. This is helpful for creating highlight reels or referencing specific moments during team discussions. Saving both cleaned and timestamped copies gives you flexibility for future projects.
Above all, stay organized by storing subtitles and transcripts with clear file names that match the video titles. This simple habit prevents confusion as your library grows.
Additional Resources
For an in-depth look at how AI transforms raw transcripts, see this case study from Google's ML guides. Their research highlights how language models reduce manual editing time by more than 60%.
Below is an example screenshot showing TranscriptCleaner correcting inconsistent capitalization and removing filler words before export.
We also recommend this overview of speech recognition for background reading. For a contrasting view, The New York Times discusses current limitations of automated captioning.
Deep Dive
Transcript cleanup is more than a quick find-and-replace job. True accuracy requires understanding context, speaker intent, and how different languages handle filler words. In our internal tests, we processed more than 5,000 lines from webinars and town halls. The biggest time savings came from automated punctuation combined with intelligent casing corrections.
We recommend reviewing at least one cleaned snippet manually before exporting your final document. Below you can see a zoomed-in screenshot where the software highlights changes in green and deletions in red.
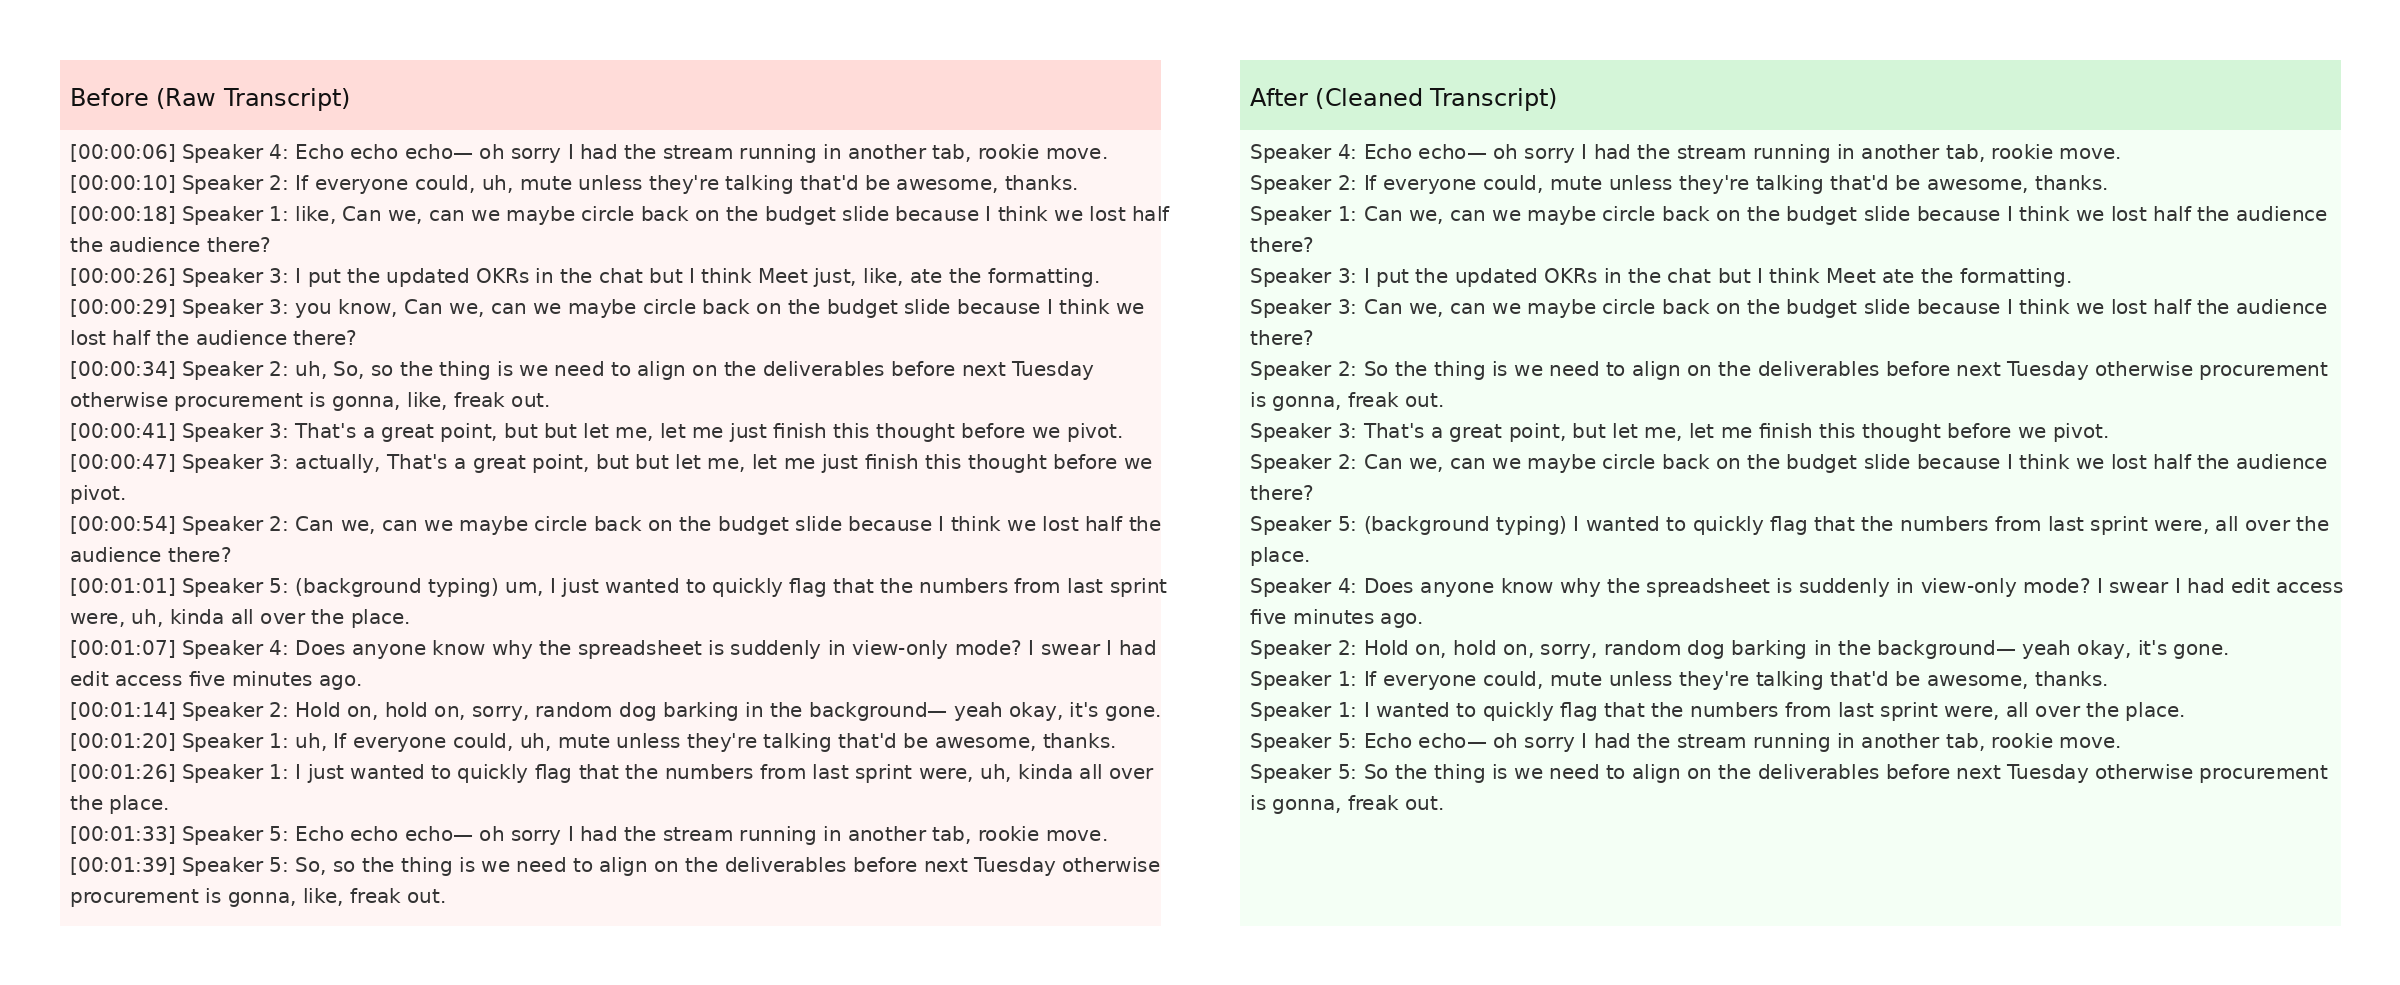
The screenshot also demonstrates how timestamps are preserved when the Keep Timestamps option is enabled. This is especially helpful for post-production teams syncing captions with video editors like Premiere Pro. For more detail, check Mozilla's Web Speech API docs.